Showing posts with label pi. Show all posts

Thursday, November 5, 2015

A Great Autumn Finger Dessert: Pumpkin Muffins topped with maple frosting and a touch of cinnamon


In preparation for the slew of people who are going to ask me for the recipe (yes, these do taste THAT good), here is what I did:


First off, I love the pumpkin bread recipe from the Joy of Cooking book that I used to own, so I copied it before giving away the book.  I used that recipe for the base of these.  I think you'll find the recipe here.


Then, you can save yourself the hours of time I spent finding the perfect frosting recipe and just head on over here for a MAPLE SYRUP frosting that is scrumptious!  Be sure to look past the cake recipe and just use the frosting recipe.  I added an egg so that I'd have more frosting when all was said and done, but I am convinced that changed little in the realm of taste.  It is amazing, and, to quote a reviewer, "like a light maple marshmallow."  Just the perfect fluff for the top of such a dense pumpkin muffin!

Just for looks, I coated them with cinnamon.  This does take some of the yummy maple syrup flavor at least, when you take that first bite of cinnamon, but I think it's perfect.  You'll have to decide if you prefer it with or without the cinnamon. :-)

Also to note, I'd recommend doing this on a day that is not hot and humid.  If you notice, my frosting is looking a bit *wet.* I would attribute this to the fact that my house is 82 degrees right now and it's raining outside. :-(  For them to look the best, I'd recommend doing it in slightly cooler temperatures and no humidity.

There you go! I hope you love them as much as I do! (Oops, did I just confess that I ate some before taking them to the party?!)


Sunday, July 8, 2012

Basil #2


Wondering what else you can do with your basil?  Here's a delicious (and colorful!) meal that's not only simple, but somewhat cool for these 100 degree days.  I am sure you can make lots of variations of this idea, so I will just give you the basics of what I did and you can use your own creativity from there.... :)

Pasta salad with basil, tomatoes, mozzarella and northern beans  (yes, really, northern beans!!)

Ingredients:

pasta
great northern beans, rinsed and drained
basil
fresh garlic cloves
olive oil
cherry tomatoes
salt and pepper to taste
shredded mozzarella cheese

1)  Marinate your basil in a bag with 1/2 to 1 cup of olive oil (depending on how much pasta you're making).  Add to the bag your cherry tomatoes, garlic cloves, and salt/pepper.

2) Cook your pasta.  At about 5 minutes left, add your beans to your pasta.  Drain.  At this point, you can either rinse your pasta with cold water to get it cool faster, or just let it sit.  (In my case, I just let it sit for half an hour because I was busy getting other things done and my sink was already full of dirty dishes... :-/  )  **Personally, I don't like COLD pasta salad, so I didn't want to put it in the fridge.  I thought it was perfect slightly cooled, so that it wasn't steaming, but it was warm enough to heat up the tomatoes a bit when they were added.

3)  Once the pasta and bean mixture has cooled slightly, add your marinade.  You can either add your shredded mozzarella cheese here, or let everyone at the table do that part themselves.

That's it!  I'm sure many of you would think of this more as a side dish, so feel free to make it that.... but in my house, I make my family go without. :-P hahahaha!  I'm sure having a side salad would have been great, but meh, that's more work.  I figure, this had something green, a vegetable, carbs (which is necessary for my hypoglycemic son)  and even good protein from the beans and cheese.  That's good enough for me.  And maybe, when it's 104 degrees at your house, it will be good enough for you too..... ;-)


Saturday, July 7, 2012

Basil #1


Finally, reaping the harvest!  Okay, in all honesty, we've been reaping a harvest of basil for weeks now, but only "finally" getting around to taking pictures....

I've had such a feeling of satisfaction this year as I planted about 60 basil plants from seed, all of which grew beautifully. I sold about half of them, but don't worry, what's left is plenty for us. :)

Of course the first thing that comes to mind when you think basil is probably basil pesto, right?  In our house it sure is.  My four year old loves pesto; consequently, that's where most of our basil goes.  Every couple of days I get to making pesto again.  He eats tablespoons of the stuff every day, after all.  (On bread, wraps, pasta, pretty much anything bread-y.)

Want some fresh pesto?  Come on over.  I'll only share if you stay a while and chat, though....  :)


Monday, February 6, 2012

Cheesecake Tart


My sweet-tooth was at it again over the weekend and I concocted another dessert worth sharing.  Here's the recipe should you feel like trying it yourself.  It's basically just a shortened cheesecake.  The benefits?  Won't sit in your stomach like a full piece of cheesecake, but still as delicious and beautiful. :)

Cheesecake Tart:

Pastry:

1 1/4c. flour
1/4c. sugar
1/2c. cold butter
2 beaten egg yolks
1 TBS cold water


1) Stir together flour and sugar.  With a pastry blender, add cold butter until pieces are pea-sized.

2) In another bowl, mix egg yolks and water.  Gradually add egg mixture to flour mixture.

3) Gently knead the dough until a ball forms.  Then, cover the dough and refrigerate it for 30-60 minutes.

4) Roll out dough and carefully (without stretching) move pastry to tart pan.

Cheesecake Filling:

2 1/2 packages (20 oz) cream cheese, softened
1/2 c. sugar
1 tsp. vanilla
2 eggs

1) Mix cream cheese, sugar and vanilla with electric mixer on medium speed until well blended.

2) Add eggs, one at a time.  Mix until just blended.  Pour over tart pastry.

Bake at 350 degrees for 30 minutes or until center is almost set.  Cool.  Refrigerate 3 hours or overnight.

For a phenomenal look and taste, serve with strawberries and drizzle with chocolate raspberry sauce. (MMMMM!)

Thursday, January 26, 2012

Chocolate Andes Mint Mousse


At last!  Another blog post!  I sure have missed posting over the past months.  Life got crazy there for a while, but hopefully some calm has come.

It's a good sign that at least some calm has returned that I have been back in the kitchen daily cooking up delicious dinners and desserts. The desserts, in particular, have been on the rise lately--and my taste buds have definitely been loving it.

Here's a new one that I came up with that is light, yet tasteful and superb.  (And when I say "light" here, I'm talking about texture, not calories.... though, I suppose you could do some substituting to get it down to a more low-calorie delight.)

Chocolate Andes Mint Mousse

*This mousse would work wonderfully as a layer to a trifle or as a filling to a pie*


1 cup Andes mints candies, chopped + more to garnish
6 eggs, separated
1 1/2 cup heavy cream
2 TBS sugar
1 tsp. peppermint extract


1) Using a double boiler on the stove, melt the Andes mints and 6 egg yolks.  (Make sure the yolks get frothy to be considered "cooked".)  When finished, place bowl in cold water to cool while you prepare other ingredients.


2) Using an electric mixer, beat egg whites until stiff peaks have formed.  Put into another bowl.


3) Using electric mixer, beat heavy cream, sugar and peppermint extract until thick.


4) Fold the egg whites and then heavy cream into the chocolate mixture in small batches, working carefully.


5) Once mixed, pour the batter into desired dish.  If you are making a pie, pour 3/4 of the batter into the pie (tastes especially delicious on a chocolate cookie crust) and freeze for at least 2 hours--use left over batter to decorate the pie.  If you are making a trifle, simple place batter in fridge and use when needed in your trifle layers.  Garnish with more chopped Andes mints.


When I made this mousse, I put it in a pie crust but only put it in the fridge.  It did not hold its shape well, so decorating it was something of a disaster.  I think the freezer method should (should!) work out a whole lot better.  That being said, it was amazingly DELICIOUS and so I had to pass it on for all of you to try. :)  Happy eating!

Thursday, June 30, 2011

Cool Treats!


Any woman who has ever given birth knows that pregnancy can be tough.  Any woman who has ever been in her third trimester in the middle of summer knows that the heat doesn't make anything easier.  

And then enters: frozen treats!

Mmmmmm, how a cool treat can change the mood.  I learned with my first pregnancy that there are lots of things that you can freeze including doughnuts, chocolate, and (my absolute favorite) grapes.  A good friend of mine offered up this information to me and I have never forgotten it.  I still love to get grapes in the summer, wash them, dry them, and put them in a bag in the freezer for later.  They are just about the best frozen treat out there.  And perfectly bite size!

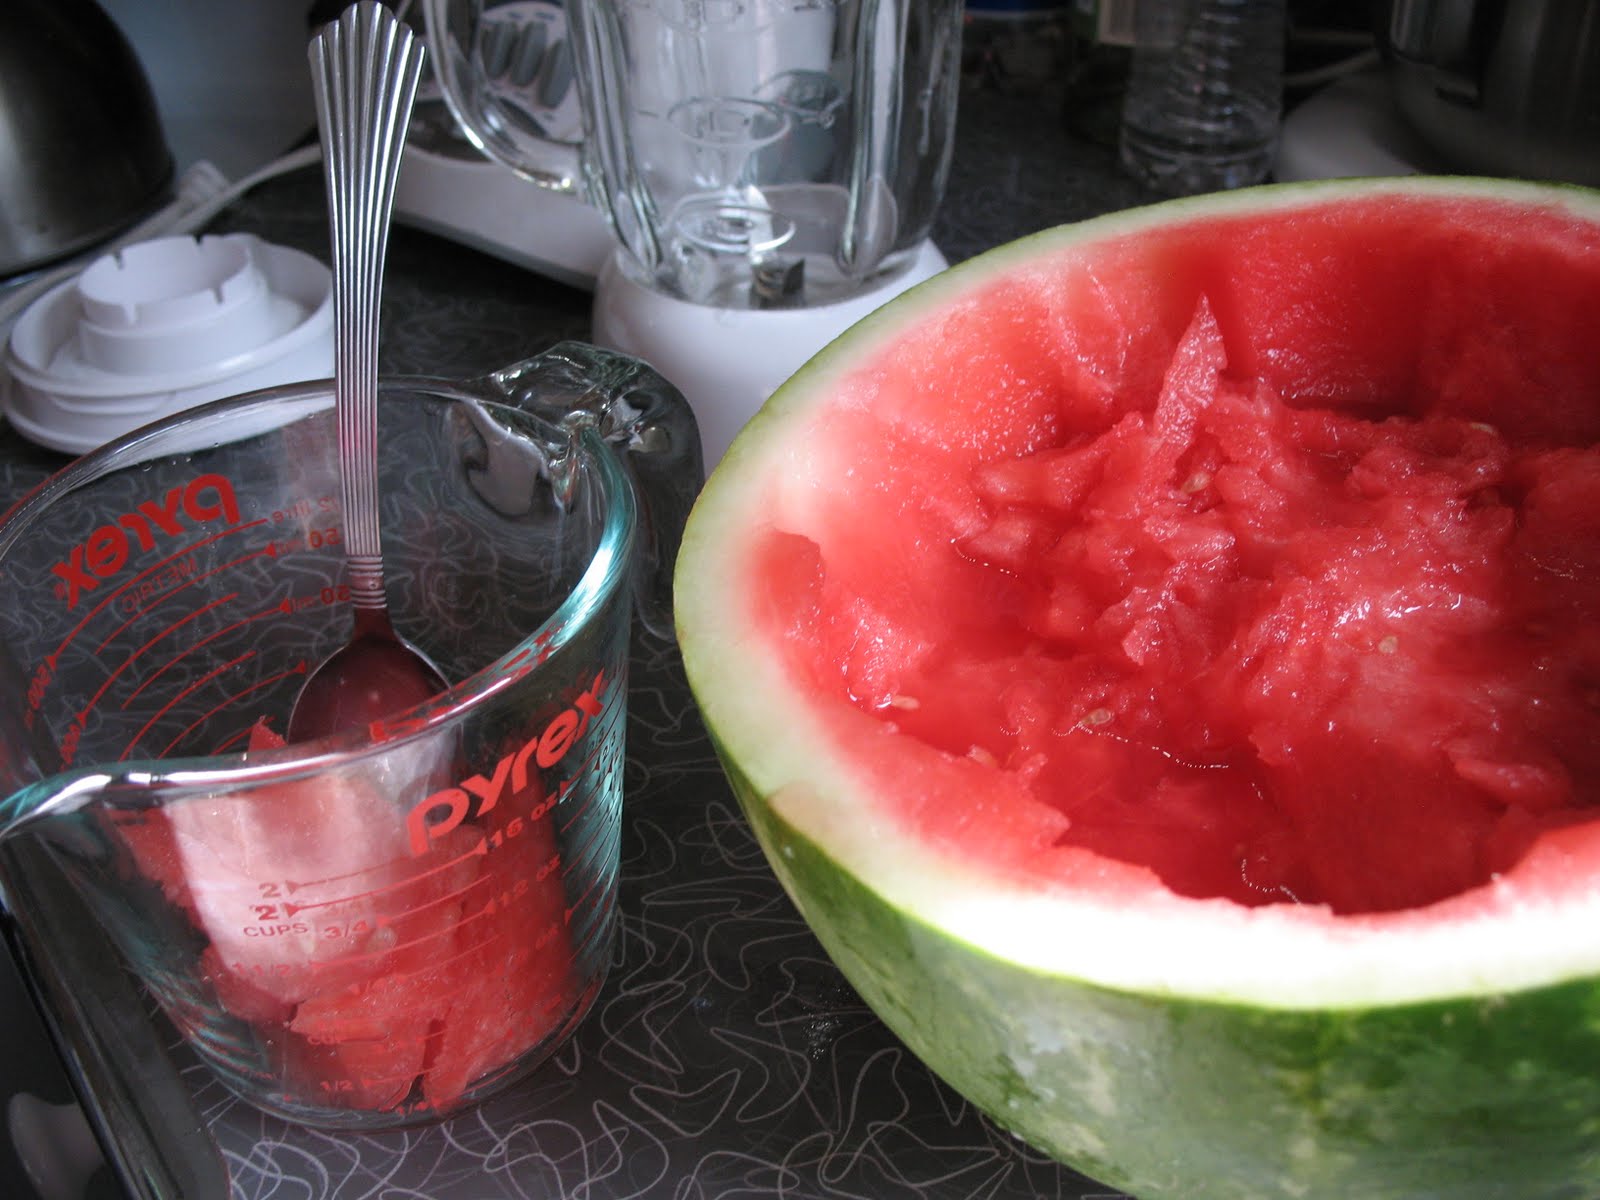
But, aside from frozen grapes, there are also popsicles.  And I decided that this year, we'd have fun making some of our own.  We started out with a watermelon, pureed it, and then added a little apple juice.  The apple juice and watermelon separated and created a super cool effect on the pops.  Check out the picture above!  The top orange part is the juice, while the bottom pink is the watermelon.  The process was ridiculously simple and I encourage you all to try!  Make some healthy homemade popsicles this summer--you can enjoy the process as much as the product!!


Step 1: Puree fruit

Step 2: Add anything else you'd like (more fruit, juice, sugar, etc.); blend again if needed.

Step 3: Freeze

Step 4: Eat and enjoy!!


Saturday, June 18, 2011

Jumping on the Bandwagon: Artisan bread in five minutes a day

I love bread.  When I want comfort food, I can rarely think of anything better than some delicious bread with warm butter smoothed over it...mmmmmmm.  My mother-in-law obviously knows me well because for my birthday she bought me a cookbook titled Healthy Artisan Bread in Five Minutes a Day.  I'd heard of the "artisan bread in five minutes a day" concept and was intrigued.  I never got the book, though, out of shear fear of having to learn something new.  Now that I had a book in hand, given as a gift, I felt I had no choice but to at least try it.

I was right, there was certainly learning involved.  I spent half an hour or more just reading the first chapter one day trying to distinguish the key features of this newfangled bread-baking technique.  I've made quite a few yeast breads in my time and was feeling pretty confident that I understood the basics.  Now I had to throw out all that knowledge and replace it with new methods.  Eek!  It was like being back in school again trying to desperately pay attention to the teacher so I would know how to do everything right.

Finally after much worry, and some new purchases, I was ready.  I had to buy some things I generally didn't have on hand, like unbleached flour and vital wheat gluten, but they certainly didn't break the bank.  On mixing day, I did everything according to the instructions and hoped.  I fought my desire to make the dough a smooth and elastic consistency.  I reminded myself again and again NOT to knead it at any point in time and to touch it at little as possible.  Today, I got to see how well I followed the directions....

DELICIOUS!  Absolutely delicious.  The whole family loved it and gobbled up every crumb.  I made a small loaf since I was unsure of the whole thing, but I know tomorrow I'll be baking more and I will make at least double.  The dough was quite wet when I mixed it yesterday, but I left it because of my fear of adding too much flour.  Today I decided that it was WAY too sticky and I definitely should have added a little bit more.  I could barely form it today (or cut lines in the dough as instructed), and even after being baked it still had a little stick to it.  Lesson learned for the next batch.

Here are some pictures of the process:

Day 1


Day 2


The finished product was like nothing I had ever made before.  The crust was tough, just like you want in an artisan bread, and the inside looked like that beautiful combination of bubbles and crumb--a loaf worth paying money for at the store.

I'm so thankful to have gotten the push to try artisan bread in five minutes a day.  I can't wait to keep practicing.  And I know my family will appreciate all of the yummy bread I to bring to the table.  Having said that, here are a couple of my thoughts after trying it for the first time....


Traditional method vs. Five-minutes-a-day

- It was in the 80s today and that's already pretty hot for a woman who's 7 months pregnant.  The fact that I had to bake the bread at 450 degrees did not put me in a particularly cheery mood.  The kitchen was hot, hot, hot.

-On top of that, whenever my oven is over 400 degrees, the smoke alarm (that was tormentingly put just outside my small kitchen by my landlord) goes off.  It's very, very loud.  And always makes me very, very irritated.  Grrr.

-Like I said before, for my first try, I wasn't quite sure what the consistency was supposed to be.  I found it extremely hard to handle (and the writers pushed hard against adding more flour once made).  I feel a little like I'm an old dog learning a new trick.... I think it's going to take a little time to get it just right.

-Also, because this dough doesn't work like a traditional dough, it was very hard for me to tell what size it would be once it was done baking.  Again, I imagine this is something that I will learn over time.  I hadn't intended to make quite such a small loaf today, but, oh well.  Now I know for next time.

-And lastly, on a good note, WOW!  This bread takes so much less active time than traditional dough.  It makes me feel like it might truly be possible to have healthy, delicious, homemade bread in our house more often than just once a month.  What a thought!

Now it's time for you to try. :-)  (Or, if you've already tried it out, tell me what you think!!!)

Sunday, April 24, 2011

"Devil"ed Eggs

Our family was invited to a friend's house for Easter lunch.  We were thrilled at the invitation, and, as a respectful guest, I asked if there was something I could bring to the table.

This is a customary offer, is it not?  When invited for a meal, the invitee should always offer to bring a dish.  In addition to abiding by custom, though, I also actually love to cook and bake. So, I always enjoy bringing something to a meal.  I suppose in truth, however, I'm always hoping that I'll be the one who decides what exactly I will bring.  I'm always hoping for a, "sure, you can bring whatever you'd like!"  In which case, I generally bring a dessert--because that's what my skill and my taste buds favor.

In this case, I was asked to bring deviled eggs.... at which point I'm thinking:  deviled eggs?! You have got to be kidding.... I HATE making deviled eggs!

Deviled Eggs are named appropriately.  Because, when I think of the devil himself, characteristics like frustrating, difficult, aggravating, challenging and destroying come to mind.  And when I think of deviled eggs, I think of just those same things.

My anger towards the small white and yellow hors devours comes mostly from the act of shelling them.  I cannot, no matter how hard I try, seem to get their shells off without tearing much of the insides apart as well.  I have tried using a spoon; I have tried running them under water.  I have tried letting them sit in the fridge for a day.  Nothing works.  Most often, I am left with a mess of a white that hardly resembles an egg at all.  Sometimes the pieces aren't even whole.

The shame of it all is that I absolutely love the taste of deviled eggs.  Again, it reminds me of scenarios with the actual devil--sometimes, looking at someone's life of sin can look pretty appealing.  The taste of the egg is so good.....  but is it worth the price to get there?

In this instance, I didn't really have a choice.  I certainly didn't feel like I could tell the hostess, "no, I will not bring deviled eggs because they will be an absolute disaster."  I did, however, warn her that they will not win any awards for beauty.  At least I had a Pampered Chef Easy Accent Decorator so that all was not lost.  Otherwise, I'm not sure anyone would have even eaten my piles of goo.  Although, now that I say that, I don't yet know if the Easy Accent Decorator redeemed my eggs or not....  I still have T minus thirty minutes until I know the true result....

Will anyone even eat my offering?


And for anyone interested in the actual history of the word and concept of the deviled egg--here's a neat site that I found:  http://www.deviledeggs.com/why_called_deviled_eggs.html

Tuesday, February 8, 2011

DELICIOUS!

I have recently decided that trifles are pretty cool.  Sadly, I don't have a trifle bowl.  Thankfully, I have a friend who does.

We had some students over for dinner last weekend and it was requested that I make a banana trifle.  I found a simple recipe online for a caramel banana trifle, but I don't like simple.  Simple is boring.  Here was the basic recipe:

layer of pound cake
layer of vanilla pudding
layer of banana
layer of caramel
layer of cool whip
repeat

Yes, a great beginning.  But I made it even better.  Here was my trifle:

layer of homemade caramel pound cake
layer of french vanilla pudding
layer of bananas
layer of caramel
layer of caramel sprinkles (in this case from Pampered Chef)
layer of cool whip
repeat

Not that different in essence, and yet totally different in taste.  The caramel pound cake and caramel sprinkles make this dessert unbelievably delicious.  So, here is the recipe I used to make the caramel pound cake.  It may take longer than going to the store, but trust me, it's worth it.  You won't regret the time spent.


Caramel Pound Cake
Instead of putting the cake into a tube pan, I separated the batter into two loaf pans and baked it for 3/4 the time.  I used one loaf for the trifle.  You can either wrap and freeze the second, or, make another trifle days later after you've finish the first....since you'll want to keep eating it. :)

Here are the amounts you'll need for the layers to accommodate a trifle bowl:
1 pound cake
2 packages pudding
3 bananas
1 jar caramel sauce (I used about half of mine, but you could definitely use more)
1 large container of cool whip (or two normal size containers)
Tablespoon or 2 of caramel sprinkles


Sunday, February 6, 2011

heart muffins!

I was making banana chocolate chip muffins for a Valentine's Day gathering last Friday and was trying to come up with a way to make the yellow and brown muffins a bit more festive.  I found some ideas online about forming aluminum circle muffin liners into hearts, and then baking them on a cookie sheet.  Sounded perfect!  The only problem was that my muffin batter ended up being pretty stiff--it was the first time I had made this particular recipe, so I didn't have any prior knowledge about the final consistency.  The stiff batter proved to be a little tricky to get into the heart-shaped muffin liners, but, I persevered!  It was definitely worth it.  But, the next time I attempt hearts, I will definitely use a softer batter.  Here are some pictures of the results.  I would encourage you all to make some heart muffins this Valentine's Day--they'll be a hit no matter where you take them!


Tuesday, January 18, 2011

Simple. Quick. Delicious. One of our favorites.

There are a lot of us out there who are somewhat carbohydrate obsessed.  Or at least, I like to think I'm not alone.  I would take a soft, bready treat over candy any day.  When it comes to my meals, there is almost always a disproportionate amount of carbs to proteins..... quarter plate of protein....quarter plate of veggies.... half a plate of carbs.  Yep.  That's how my dinner plate usually looks.  For those of you who also like to chow down on the carbs, I have a wonderful, simple and quick meal that may  just become a favorite in your house like it is in ours.

Pasta with Broccoli and Chicken Sausage

You'll need:
-1 lb. pasta, your choice
-2 crowns of broccoli
-two cloves of garlic
-half a package of chicken sausage (we like the roasted red pepper, or spinach and mozzarella for this meal, but you can choose whatever you think sounds good--that's the benefit of chicken sausage!)
-olive oil
- 1c. romano cheese

To make:

1) While heating the water for the pasta, cut broccoli into bite-size pieces (not too small)
2) When water is ready, put in pasta.  Set timer.  Cut chicken sausage into 3/4 inch pieces. Put 2TBS olive oil in a skillet and add crushed garlic cloves; set on medium.
3)  When pasta is at about 6 minutes left to cook, get it to a rolling boil.  At five minutes, add broccoli and cover.  (Keep a boil going to cook.)
4)  When oil in skillet is hot and garlic is translucent, add chicken sausage.  Cook until browned.
5)  When pasta is cooked, drain, and add 1c. romano cheese, and olive oil to desired taste.  Add salt and pepper to taste as well.  Add sausage.


Here are some pictures of when I recently made the recipe, but note that this is a double batch.  We had a lot of broccoli to use up (5 crowns I think!) and since my family gobbles this stuff up, my husband recommended I just double the batch.  I couldn't stir everything together well at the end, so I ended up just putting the cheese on top instead of into the bowl.  And this was the first time I'd used linguine--usually we use shells or radiatore or penne--and I will say it's a lot more difficult to stir when all is said and done!


(This is my son enjoying his reflection in the pot!)


Friday, January 14, 2011

A Picture Guide to Breadmaking

I know growing up that I rarely got the chance to see bread made by hand.  And, sadly, those times I did get to see the process, I was too young to etch into my memory the crucial points necessary make a mouth-watering loaf on my own.  I've tried to learn from trial and error how to make a delicious bread, but I have definitely failed numerous times along the way.  None of my creations were ever inedible.  But some of them certainly wouldn't have been described as "amazing" or any synonym thereof.

I do know that early on, it would have been helpful for me to see some of what the process looked like.  I am a visual person and when I read something, I have to see it in my mind before I really feel like I can understand what I'm reading.  So, in an effort to give you a little more insight if you're a beginner, or, to give you some motivation if you haven't tried it yet, here is my picture guide to breadmaking.  Do bear in mind that some of these steps don't hold true for certain breads (like gluten-free breads for example), but most breads would use this same process.  Once you get these basics down, you'll be able to make almost any bread you want!  Is your mouth watering yet?

This recipe is an herb bread based on this.


Monday, December 20, 2010

Sugar Cookies!

I made it my goal to find that "one" sugar cookie recipe that would be fit for all my needs.  I'd tried many recipes in the past, and never could find just the right one.  There were ones that I found easy to cut out but lacking in taste.  Others were delicious but would never look beautiful.  I did come across some recipes  that both had a good taste and look, but they still didn't seem just perfect.

Alas!  I have come upon the most perfectest of perfect sugar cookies recipe.  If you like cookies that are thick and moist, this recipe is for you!  These are not thin and crispy, so if those are the kind of cookies you like.... well, you should change your taste. These cookies are far superior to your thin and crispy biscuits.

I came across this sugar cookie recipe at allrecipes.com, but many of the reviewers thought the cookie was too bland.  I liked the sound of the recipe, but wanted to fix the taste issue.  There were a couple of ideas on the site, but I had made cookies weeks ago that used almond paste and loved the result.  I still had half the can left, so I decided to add it to the recipe at allrecipes.com.  The result?  FANTASTIC!

The cookies were super easy to cut out (almond paste makes a helpful glue) and puffed up just right in the oven.  They also tasted GREAT!  They were delicious with or without icing.  The perfect sugar cookie.

My three year old even helped with the decorating.  I put icing on the cookies and he added decorations on top.  It was so easy and he loved it.  And when he wanted to be artistic with the icing, I put a little pile on the plate and gave him a toothpick.  He used the toothpick like a paintbrush and went wild.  So, go ahead!  Make something delicious at your house, and get everyone involved!  The creative process is fun, and so is the consumption process when you're done!


Here's what the recipe looks like when you add the almond paste:


Ingredients

  • 3 cups sifted all-purpose flour
  • 2 teaspoons baking powder
  • 1/2 teaspoon salt
  • 3/4 cup butter
  • 3/4 cup white sugar
  • 1 egg
  • 1/4 cup sour cream
  • 1 teaspoon vanilla extract
  • about 1/2 c. almond paste

Directions

  1. Sift flour, baking powder, and salt. Cream butter with sugar, beat in egg, then stir in sour cream and vanilla.  Add almond paste.   Stir in flour mixture 1/3 at a time.
  2. Wrap dough in wax paper and chill for 2 to 3 hours.
  3. Roll out 1/4 inch thick. Cut out cookies with your favorite cookie cutters. Put on ungreased cookie sheet. Bake at 350 degrees F (175 degrees C) for 10 minutes.


This is my son putting M&M wheels on his train.


This train was a cooperative effort--the engine was made by our 15 year old neighbor, the first car by my 3 year old son, and the last car by our 14 year old neighbor.


I joined in the fun too, though, not until everyone else had gone.  I made a cookie to look like my husband--he's holding it here. :)

Sunday, December 5, 2010

The key to having a great party

I love love love having people over.  Our house isn't big or gorgeous, and I certainly don't keep it spotlessly clean.  But, that doesn't keep me from inviting people over every chance I get.

Today I had my first Pampered Chef party, and I think it went pretty well.  It definitely got me motivated to have another holiday party next year--but I'm thinking maybe I'll do a "caroling" party instead.  Who knows; really, I have an entire year to decide.  No rush!

Since my party went so well, I figured I'd let you guys in on a little secret to party success.  Some of my guests were wondering how I could have such an amazing array of food and yet have two small children to take care of during the week (and a husband too, don't forget!).  Here it is (shhhh, don't tell....):

PLAN, PLAN, PLAN!

I made sure to organize everything from what dishes I would prepare to what days I would prepare them to what time I should set them out on the table the day of the party.  Tuesday I made caramel chex mix.  Wednesday I got the pomegranate ready.  Thursday I made egg nog pie.  Friday I went grocery shopping for the rest of the ingredients I needed and also made cream cheese mints.  Saturday I made brownies (for the show) and pumpkin mousse.  I chopped all the veggies for the veggie tray.  I also took a couple of minutes to make some holiday-themed lanterns.  (Remember these lanterns?  So versatile!)  Sunday, I got some mulled cider ready in the crock pot hours before the party, and quick put together some "pigs in a blanket."  Tada!  That's it!

Here's some of what I made:

Fudgy Brownies
Pumpkin Mousse
Cream Cheese Mints
Pigs in a Blanket

Okay, go to it!  Plan your own party and HAVE FUN! :D


Pumpkin Mousse


Egg Nog Pie


Veggies and Pomegranate


Caramel Chex Mix, Cream Cheese Mints and Lanterns

Thursday, October 21, 2010

Pumpkin Rolls

As I've mentioned before, I love pumpkin.  And pumpkin knot rolls don't last long in our house.  I always double the batch and put half in the freezer.  Pull one out any time you'd like, zap it in the microwave for 10 seconds (or more, depending on your microwave), and tada!  Tastes like it just came out of the oven.
I used to buy Challah bread at our local Whole Foods in Cambridge, and these rolls remind me a lot of that Challah bread.  Perfect outside, perfect inside....you can eat it by itself, or with just butter, or with anything you like.  The perfect comfort food.  I paired it last night with a bowl of  Panera Bread broccoli cheddar soup.  It was FANTASTIC!  I'd recommend it. :)  Here's the recipe for the rolls, and I've also included a step-by-step how-to if you want to make them but haven't made any kind of bread before.  They're not hard, really.  And if you look at my pictures, it will make it even easier. Don't be afraid!  These rolls just melt in your mouth.

Pumpkin Knot Rolls

2 pkgs. active dry yeast
1c. warm milk (110-115 degrees)
1/3c. butter, softened
1/2c. sugar
1c. canned pumpkin
3 eggs (2 + 1)
1 1/2tsp. salt
5 1/2-6c. flour
1 T cold water

In a mixing bowl, dissolve yeast in warm milk.  Add the butter, sugar, pumpkin, 2 eggs, salt and 3 cups flour.  Beat until smooth.  Stir in enough remaining flour to form a soft dough.  Turn onto a lightly floured surface; knead until smooth and elastic, about 6-8 minutes.  Place in a greased bowl, turning once to grease top.  Cover and let rise in a warm place until doubled, about 1 hour.  Punch dough down.  Turn onto a lightly flour surface; divide in half.  Shape each portion into 12 balls.  Roll each ball into a 10 inch rope; tie into a knot and tuck ends under.  Place 2 inches apart on greased baking sheets.  Cover and let rise until doubled, about 30 minutes.  In a small bowl, beat water and remaining egg.  Brush over rolls.   Bake at 350 degrees for 13-17 minutes or until golden brown.  Remove from pans to wire rack.  Yield: 2 dozen.

(In the pictures below, I doubled the recipe.  Because I doubled the recipe, I added the extra flour by hand in the beginning of the kneading process.  If your mixer can handle doing that by itself, start with number 3.)